California Ajax Solutions Team
www.CalAST.com
Chapter 7. Running a Report
In the last chapter, we showed you how to design a report use the DynaCRUX report builder. When you finish your design, you have the choice of running it as an instant report or saving it for the future. In this chapter, we will show you how to run a saved or instant report, and show you what some of your design choices do.
In the future, DynaCRUX will let you save reports in a database table. For now, the only choice is to save reports in the Reports directory or as a temporary file in the uploads directory. When you ask DynaCRUX to run a saved report, it displays a list of all the known reports in the Reports directory and lets you choose the one you want to run. If you chose an instant report, we just skip this step since there's only one report file possible
Of course, you may not wish to give your users access to all the reports you have defined. For example, financial reports that only management should be able to run ought not to be available to customers. There are several ways to organize your site to solve this problem. But the one that gives you the most control is simply to provide your own user interface for report selection as part of your web app.
The way DynaCRUX runs reports is simply to pass control to the run report controller (an app that runs on the server), passing the name of the report and some other details on the command line. So it's pretty easy for you to just do this in any way that makes sense to your business model. We will show you what the run report controller expects so you can do this in your application.
Output Formats
DynaCRUX can produce several output formats for reports. You choose the format at run time; any report can be run to any output format. Here are the choices.
- genweb: You can output the report to a generated web page. This was the default in earlier versions for saved web pages. The result sets are simply output in order within the body.
- instant: When you run a report within Report Builder, this is what you get. It looks much like a generated web page but without the documentation header, head section, or body tags. The result sets are displayed in order within a special div inside Report Builder.
- page: Starting with 2.0, you can output result sets into named div areas of a user-provided web page in the Pages directory. This allows you much more control over what the output looks like. Run report simply returns the "filled-in" web page instead of the generated one.
- csv: If you click on one of the Run to Spreadsheet buttons, a CSV (Comma Separated Value) file is produced on the server. You are then given the opportunity to download it, and it can be opened in your preferred spreadsheet program.
- xml: This output can be returned to you by the run report app so you can use it to build your own web page inside your web app. This is not yet available, but will be added in a future release.
Note that the first three choices all produce HTML output, although only genweb produces a complete web page within the app.
Now, let's look at the two ways reports are run using the DynaCRUX default web app. You can replace this in your web app if you ensure the software is run in about the same way.
Running a Saved Report
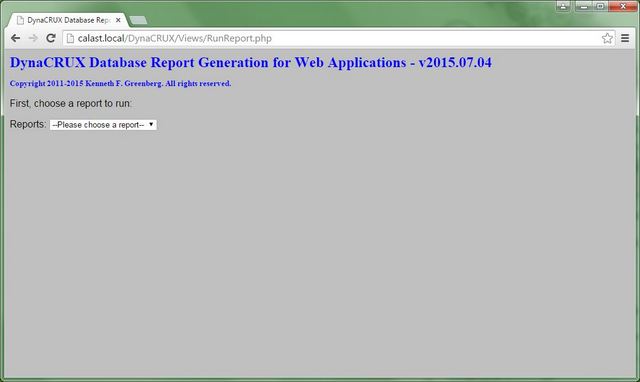
Requesting that a saved report be run loads the web view RunReport.php. This builds a drop-down list of all the reports in the Reports directory and waits for you to choose one.
When you do so, the list is hidden and any run-time controls in the selected report appear. Note that run-time controls are presented on a per-dataset basis; if you have more than one result set, you will be asked for run-time controls for each one. You don't have to make the same choices for every result set.
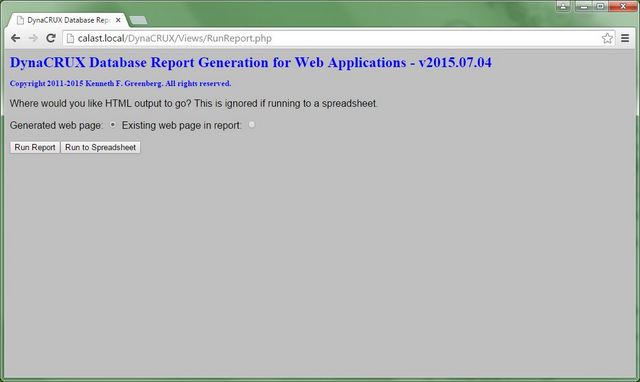
You are also given some choices regarding output format. There are two radio buttons. The first selects a generated web page, and the second selects a page stored in the Pages directory. If you select the second, the file name must match the one specified in the report file. But the run report controller only uses that information if it is told on the command line to use page output. Thus, you can override that decision at run time. Below them is a button bar giving you two choices: Run Report and Run to Spreadsheet. If there were run-time controls for the report, they would appear between the radio buttons and the button bar.
If you choose Run Report, then a new page load occurs and the content is replaced by the output of the controller runReport2.php, which should be your report - assuming no errors occurred. The generated web page is relatively simple, although your report can contain styling information. And, of course, your own web page can look like anything you want it to. Here is the generated web page for our wine list.

If you choose Run to Spreadsheet, the report will still be run by the same controller. However, the output will be formatted as CSV and you will see a button labeled Download. Clicking on this will tell your browser to download and save or open the output file.
Running an Instant Report
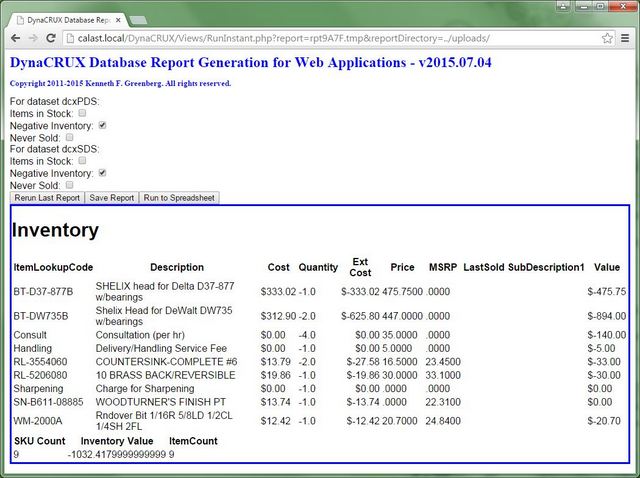
You can only run an instant report from within the Report Builder app. It is intended that these reports be used either to get a quick answer to some question that has arisen, or to test a report before saving it. In the default DynaCRUX apps, instant reports are not run to a new web page. Instead, their output goes to a DIV on the instant reports page RunInstant.php. That area of the page appears below run-time controls and is a blue box (initially collapsed). This lets you run the report more than once to try out different options. Here is an example for a report with two result sets. Note that you are asked to specify the values of the run-time controls for each set, as they may be different.

We choose Negative Inventory for both result sets. When you click on Run Report, the output of the report will be directed to the blue box below the button bar.
You could now change the run-time control selections and click on Rerun Last Report to try other options. If you are convinced that the report does what you want, you also have the option of saving it as a permanent report in the Reports directory. Clicking on Save Report prompts you for the name under which to save the report file. This option only appears after the report has been run.
The way this is implemented is that the instant reports page is passed the name of a temporary file in the uploads directory created within report designer. After the report has been run once, it is renamed as instrept.xml in the same uploads directory. This allows you to rerun the report under that file name, or copy it to the Reports directory under a new name.
As with running a saved report, you can choose Run to Spreadsheet to get your report in CSV form.
Invoking the Run Report Controller
All methods of running reports invoke the same controller, so we will now describe how that works if you want to incorporate it into your web app. If you just want to use the default DynaCRUX web app, you can ignore this section.
The DynaCRUX run report controller is located in the Controllers directory, and is simply called runReport2.php. If you create a DynaCRUX directory inside your web application (recommended but not required), then the name of the controller will just be ./DynaCRUX/Controllers/runReport2.php.
As noted, this controller expects you to tell it the name of the report to run. The assumption is that this report is stored in the Reports directory, but you can override this if desired. Here's the list of what you pass to the controller at run time:
| Argument | Required | Meaning |
| report | yes | The name of the report file, normally xxxxxx.xml |
| reportDirectory | no | Where the file is located. By default, it is ../Reports/ (relative to the location of the Controllers directory. For instant reports, it is normally ../uploads/ instead. You can specify any directory you like, but make sure it includes the final / character. |
| output | yes | The desired output format. Must be one of (genweb, instant, page, or csv). |
| controls | yes | You must always provide the XML to specify the run-time control values. If there are no controls, then you need to pass the empty controls section as <controls></controls>. If you do have controls, then you need to fill in additional XML to provide the name and value of each control, as described below. |
For each run-time control in the report, you need to add a a control descriptor to the controls section. Since each dataset has its own controls, we need to specify which controls go with which dataset. The XML for a control is simple - you need to specify a name and a value. Of course, the name needs to be known in the report file, and the value must be reasonable for the report type and the report file. So the XML for a control looks like:
<control>
<name>ctlname</name>
<value>ctlvalue</value>
</control>
The whole controls section is a bit more complex.
<controls>
<dataset>
<dsname>dcxPDS</dsname>
<control>
<name>ctlname</name>
<value>ctlvalue</value>
</control>
</dataset>
</controls>
You simply add as many datasets and control entries as are required (including none) to your controls section. Since this is passed on the command line, it really appears as a single line. Alternatively, you can pass this invisibly (as POST data instead of GET data). The controller is written to accept input in any way that it shows up.
If you are designing your own web app, you should be asking yourself "How do I know what controls are in a report so I can display them?" The answer is that a controller is available on the server to retrieve that information for you. It is called getReportControls.php and you simply pass it the name of the report file (as report=yourReportName.xml") as part of the URL. You can also pass it a reportDirectory argument if your reports are not in the Reports directory. It returns XML describing the report controls on a per-dataset basis. DynaCRUX uses Ajax techniques to retrieve and process this XML.
Specifying Run-Time Control Values
In Chapter 5, we explained all the different types of run-time controls that you can create in DynaCRUX. This is where you actually get to see them and specify values. The values that you specify are passed to the run controller on the command line for use in generating SQL.
Here is a view that shows a number of different controls available for specifying run-time values:

We have already chosen which report to run, and it specified that it wanted inputs from a check box, a text box, a date box, a radio button group, and a select (or drop-down list). This is, of course, our test file for evaluating that run-time controls are working properly. Your application will presumably have more meaningful names. So let's look at what happens to the values filled in on this view, which you do before clicking on either Run Report or Run to Spreadsheet.
Checkboxes are simple, as you would expect. You see only the label you specified, and a checkbox. Checkboxes are binary, and are off by default. So you just check the box to set the value to true. However, HTML behaves in a slightly unintuitive way; if you are a web app designer, you probably already know this. If a checkbox in a form is not checked, it does not even get passed to the controller. DynaCRUX works differently, and actually always passes the value as either 1 or 0 to the controller.
Radio button groups allow you to select one from a group of choices. The DynaCRUX user interface requires that you make a selection, or you can't run the report. If you are writing your own user interface, we recommend you do the same. If not, there is a strong possibility that DynaCRUX will not be able generate proper SQL for your report. It will either fail, or at least get you results that are not what you expected.
Drop-down lists allow you to specify one or more values for a control - these are called selects in HTML. These controls can be either single-select or multi-select. The way HTML usually processes these controls is to make the first option be selected by default for single-select controls and no item be selected for multi-select controls. As with radio buttons, you should ensure (as DynaCRUX does) that there is a selected value. For multi-select controls, the XML is slightly more complex. The value XML node has a node underneath it called <list> that contains a comma-separate list of the selected values.
All other control types (text boxes, date boxes, etc.) simply pass the specified value, even if it is empty.
The behavior we have described here is all about the way the DynaCRUX user interface works. If you are writing your own GUI as part of your web application, then you can always change this behavior. As noted above, the download argument to runReport2 controls where the output goes, and you can run this controller any way you wish.