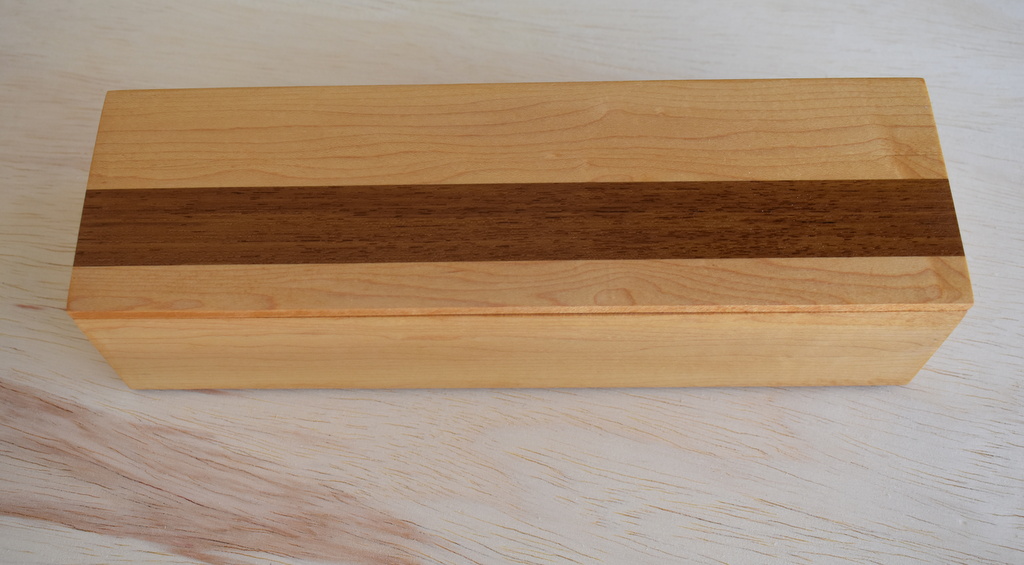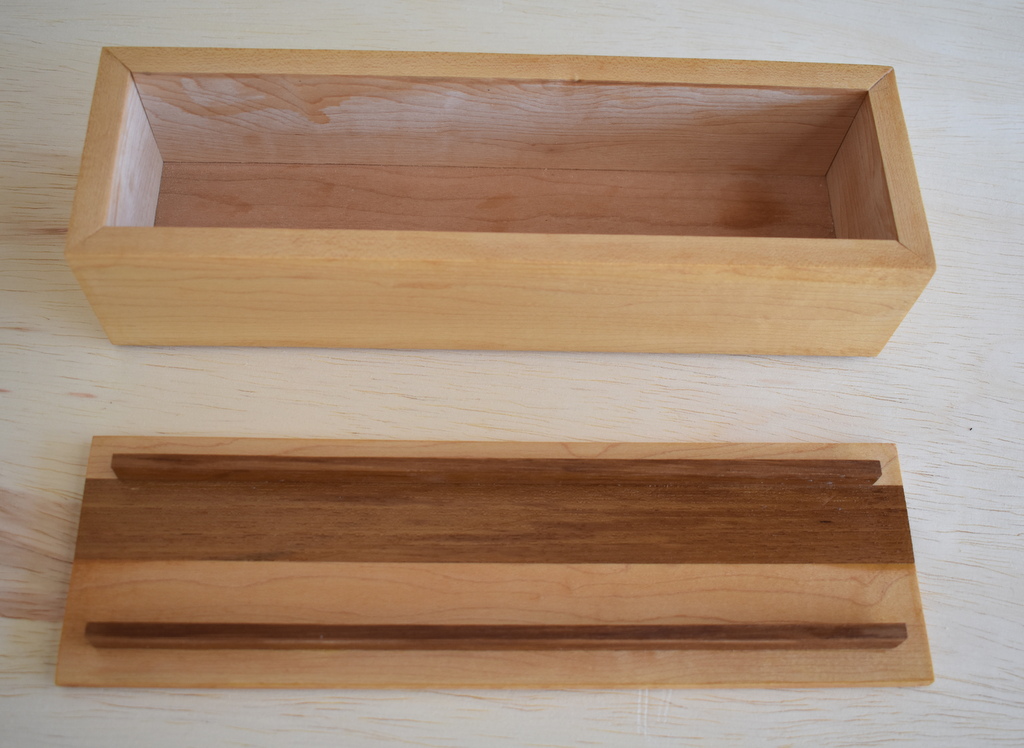

Wood: Curly maple, teak, cherry plywood
Finish: Lemon shellac
Our daughter Liz lives in France with her husband, but does come over to visit about once a year. In early 2023, we all went up to a local crafts gallery that has really interesting projects. I buy a lot of their blown glass works. Being attracted to things made of wood, I noticed a small display of wooden boxes made of various woods. I rather liked the idea, although my taste and the builder's were a little different. So, getting back to the shop and having one or two other box projects in mind, I decided to build a small box for Liz as a gift for her next birthday. When I moved to the east coast, I gave away most of my wood supply rather than move it all 3000 miles. But I kept a few small pieces, one of which was a curly maple board about three feet long. That became the basis of this box.
I needed something to be a contrast, and I had some teak in the shop. This was bought to repair a table that had been damaged by local movers - but I only needed a very small strip for that. The smallest piece I could buy from the local lumber dealer was a foot long. So there was plenty of that around. The dimensions were pretty much determined by the stock on hand. It had to be shorter than a foot, and the circumference had to be shorter that the length of the maple board. It ended up about 10 3/4 x 3 1/4. The maple was pretty thick, so I was able to rip it in half (approximately) and use the thinner piece for the top. Some waste there, of course. I'll find something to do with the leftovers. The box itself is pretty simple, so I just cut all the pieces to length with a ryoba.
As usual, I cut the corners to 45 degrees on the "guillotine" (my sliding miter trimmer) and fit it all together, measured up the dimensions and cut out a suitable piece of cherry plywood as a bottom with my ryoba. That was the easy part. I spent a lot of time thinking about what the top should look like (now that I had a size for it). The teak was a bit over an inch thick, so I had a strip that wide. I chose to make the front edge maple about half that (say, 5/8 inch). This was a much easier glue-up than the oak box - they were made at the same time.
The stock for the top ended up pretty thin, so there was really no room for a conventional hinge. The boxes at the gallery used what I like to call a slot hinge. It has no screw holes, but you make a narrow slot in the top and body (with a thin wheel cutter on a Dremel tool, I guess), then press fit the hinge into the slots. I looked around on-line, but I could not really find any like he was using. Of course, a couple of weeks later I was looking for something else in my shop, and I found I had some on hand. Figures. By then it was too late, as I had already moved on to Plan B. I have made boxes where the top has a recess in it, and I added two small wood strips to the base that project above the interior to exactly fit the inside opening of the top. Here, I just reversed it since the top had no gap. But every box does. So I glued two small teak strips to the bottom of the top that exactly fit into the box base. You need to be really careful when you do this, so that the top lifts off easily but is not too loose when in place.
Once everything fit together, I glued it all up using my trusty band clamp. Then, on to the about six coats of lemon shellac to build up a polishable finish. Then, rub it out with pumice and rottenstone and wax it.